Swirled Brushed Metal
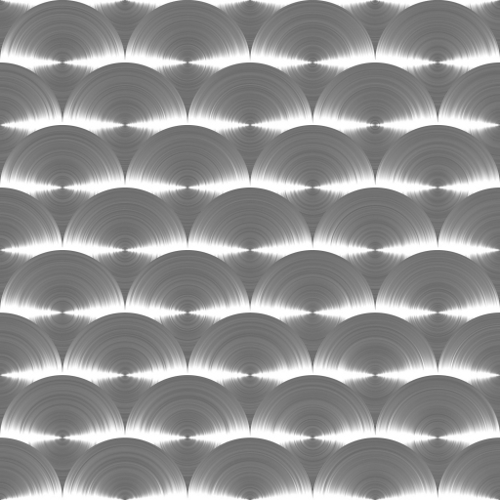
Lighting effects can greatly enhance any metal image if applied properly. Too much and it just looks cheesy, but just the right amount can make an ordinary image look photo-realistic. What we will attempt in this segment is that swirled, brushed metal finish similar to what you sometimes see metal tables made with. Here’s a photo of our metal.
The only thing required for this tutorial is Rod’s “Steel_Pencil_RD” gradient which is included in the zip file attached in the
Metal Wurx – Part I tutorial. Download and open the zip file to install the gradient into your Gimp “user” folder. If you already have Gimp open when you install it, just go to your Blend tool options and refresh your gradients. If you install it first and then open Gimp, it will already be available to use. Hang in there as this one is also a bit long but it really is a lot simpler to do than it is to explain so here goes.
Step 1.
Open a new image, 200x200 at about 1200 ppi so we have some decent resolution. Right click on your background layer in the layers dialog and select Add Alpha Channel.
Step2.
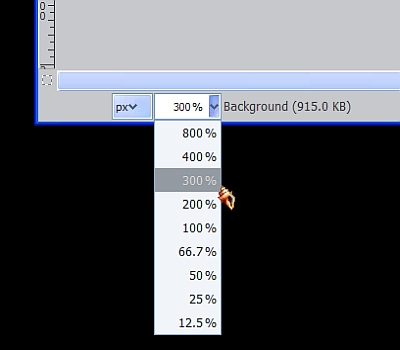
Set your Foreground color to a medium gray (808080) and drag the color over to your image (or use the Bucket Fill tool) to fill it with the gray color. Now adjust your view setting to 300%.
*TIP: For those beginners who don’t already know, you can change your view setting by going to View>Zoom>2:1 (200%) and then go back again to View>Zoom>Zoom In to get to 300%. Once you set any oddball view setting like this one, not normally appearing in the View>Zoom list, you can more easily change it back and forth again by using the little box at the bottom of your image window instead, which includes the standard ones up to 800%, plus it records all view settings you have been using during this session.
Step 3.
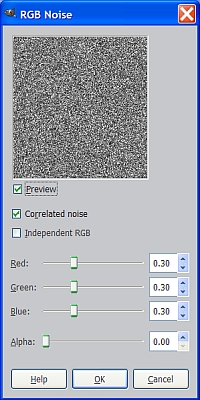
Go to Filters>Noise>RGB Noise and enter the values in the screenshot below. Be sure to uncheck the box where it says Independent Noise and check the box for Correlated Noise.
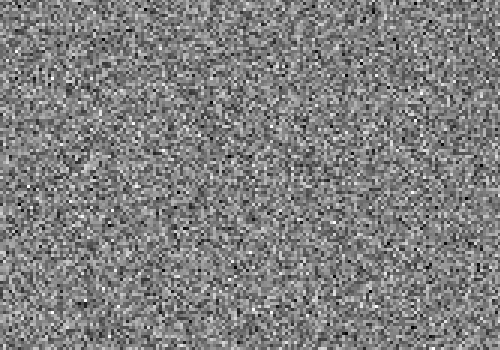
Your image should be saturated with a lot of dots in various shades of gray like this.
Step 4.
Go to Filters>Blur>Motion Blur and set the blur type to Radial and since our image is 200x200, set the x & y coordinates to 100. We want to reduce the center distortion as much as possible but still maintain as much definition in the striations as we can so we will use 30 as the angle. If you change the values to 20 or 40 and watch the window in the Motion Blur dialog box you will see what I mean.
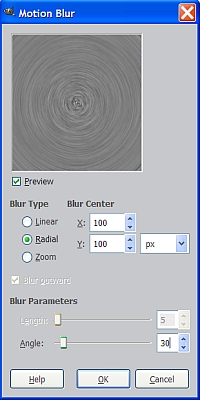
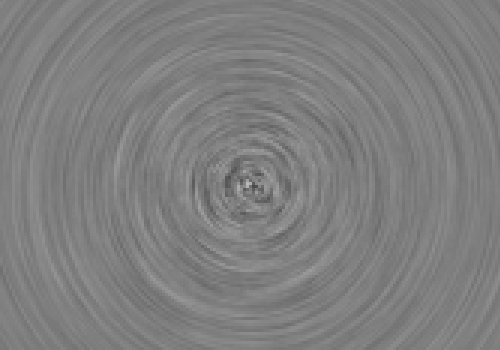
When you have entered the Motion Blur settings to your liking, click OK and wait a little bit for the filter to complete the operation.
Step 5.
Go to Filters>Enhance>Unsharp Mask and enter the settings shown below and Hit OK.
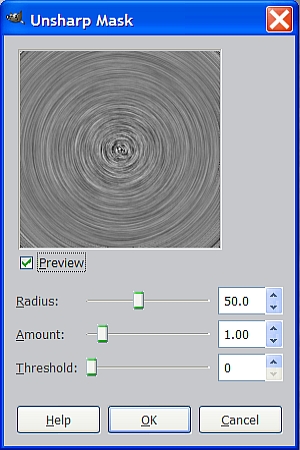
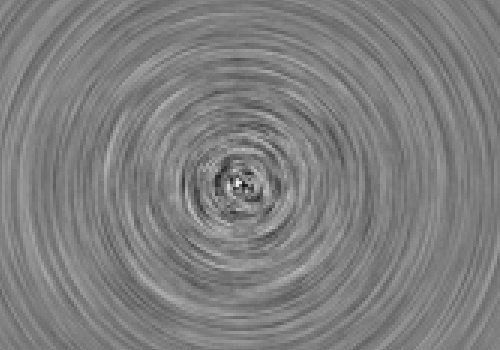
This will bring out the contrasting light and dark areas and help the lines to show up a little more.
Step 6.
So far we haven’t done anything much different than what I have already shown you in Metal Wurx – Part 1 covering different ways to make brushed metal textures. Here’s where we look at more ways to enhance the appearance of your metal finishes.
Go to Filters>Light and Shadow>Lighting Effects. This filter is extremely powerful and can be very confusing for the novice. Once you have used this filter a dozen times or so you will be able to do some really amazing things with it. There are several settings requires and you will find these located on the five tabs at the top of the filter dialog box but we will only use four of them for this step.
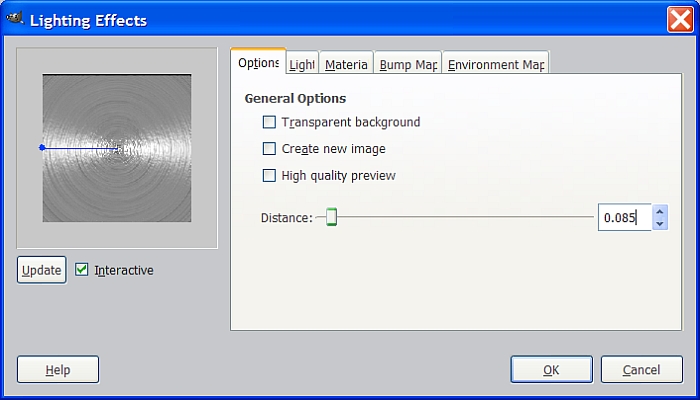
First, let’s use the Options tab to set the distance to .85. When you hover your mouse over the setting area a little pop-up will appear explaining that this is the distance of the observer from the surface you are working on. (I have already made all my settings so the little image in your dialog window will look a little different than the one shown here.)
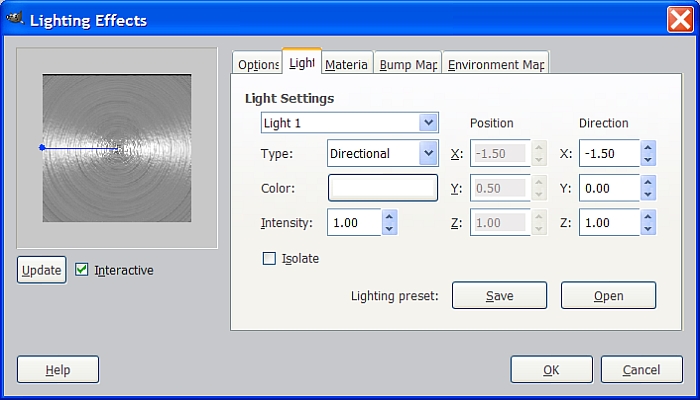
Second, select the Light tab at the top to put some light on the subject. (sorry for the pun, I couldn’t help myself). Click on the Light Settings drop down arrow and you will see that you can set up and apply up to 6 different lights. We only need two so let’s start with light #1. Set the Type to Directional, and under the Direction, set X to -1.5 and Y to zero.
Make sure the intensity is set to 1. Don’t click OK until we finish working on all the tabs in this filter.
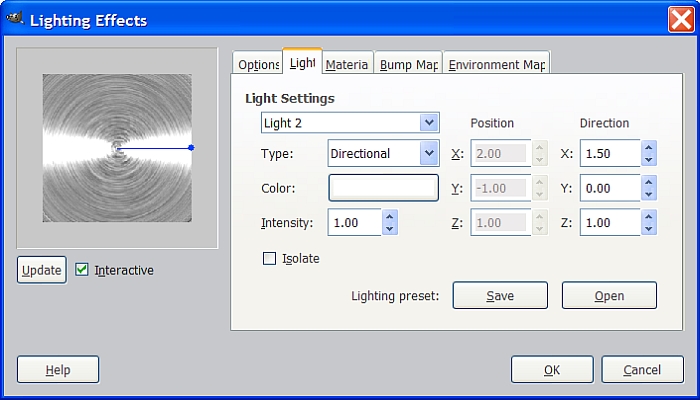
Now go back to the Light settings and select Light #2 and set the parameters as shown below.
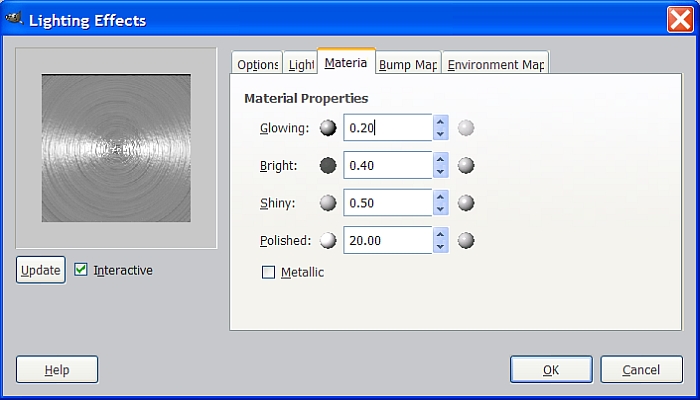
Now we move to the Material tab. You could just use the shortcut method and check the box toward the bottom that says Metallic, but for more control we have individual settings we can use to customize the look we want. You may want to try the Metallic setting just to see what it looks like, then use the Edit>Undo function to go back.
When you are done experimenting, enter the values shown in the screenshot below.
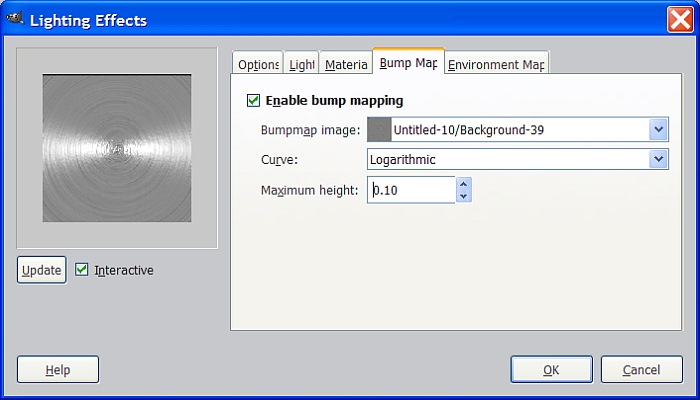
Click on the Bump Map tab and check the box to Enable Bump Map. Since we have only one layer to work with, our background layer is already selected to be used for the bump map. Normally you would select the layer you want to use for the Bump Map. Set the Curve to Logarithmic and the Maximum height to .10 as shown.
Review all the screenshots above and verify the settings you have made on all the tabs, then, when you are satisfied, click OK to apply the filter.
If you want more light, use the undo function to go back and change the settings, but remember to increase the Intensity in the Light tab for both lights equally. All your settings will be retained in the filter until you close Gimp, so you won’t have to set everything up again. Just change what you need and the rest of your tab settings will still be there. By now you should have a basic understanding of how to use this filter so feel free to make any adjustments you want.
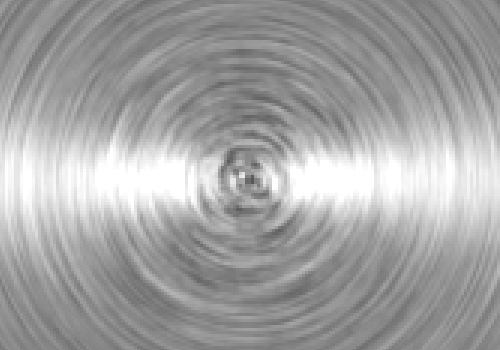
This is what your image should look like if you used my settings shown above.
Step 7.
Now that we have our lighting effects, we will use one more technique (this step is optional) for adding lighting effects. This was also covered in Metal Wurx – Part I. Create a new transparent layer above your swirled metal background layer and name it Gradient. Select the Blend tool and set the gradient to the Steel_Pencil_RD gradient you downloaded and installed for this tutorial. In the Blend tool options dialog, set the Shape to Conical. We need to use the exact center of our image so place a guide at 100 pixels exactly both vertically and horizontally.
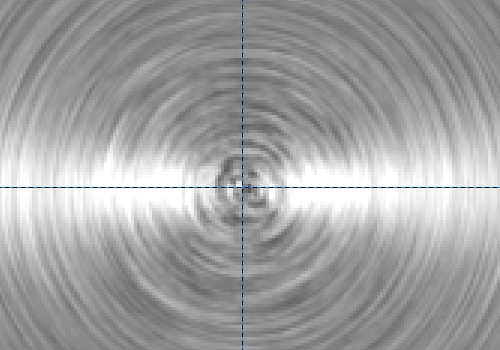
Once the guides are in place, place your mouse cursor over the exact intersecton of the two guides and use the Blend tool to “drag” from the center to any corner of your image to apply the gradient. Set the layer mode of the Gradient layer to Overlay so that we get just a subtle change in our image from the gradient. Go to Layer>Merge Down or just right click on the Gradient layer and select Merge Down.
Step 8.
Select the Ellipse tool and in the tool options dialog, check the boxes for Expand from center and Fixed (Aspect ratio). Place your mouse cursor in the center of your image again where the two guides intersect, and drag out to make a selection the size of your image at 200 pixels. Look at the two boxes at the bottom of the tool dialog to make sure it is says 200 in both boxes.
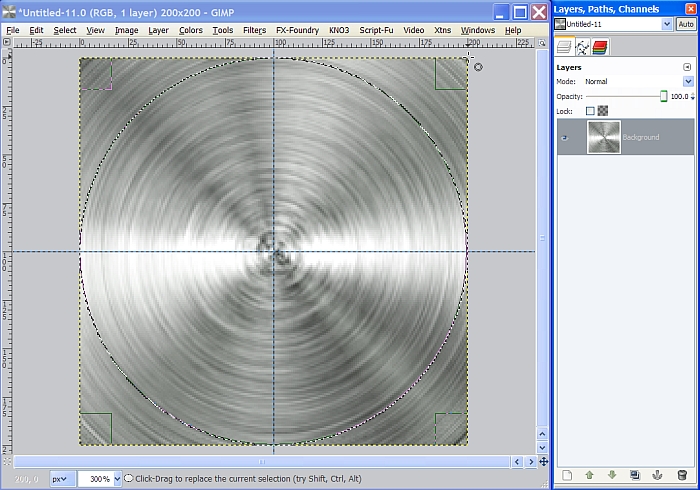
Once you have your selection correctly sized and positioned, go to Select>Invert, then hit the delete key to cut away or remove the areas outside of our selection. Next, go to Select>None to turn off the selection. Now you can go to Image>Guides>Remove all Guides.
We now have a completed pattern that we will use to make our swirled brushed metal texture. Save this image to your desktop using a .png format so it keeps the transparent background.
Step 9.
Open a new image, let’s use 1000x1000 and set the resolution to 300 ppi. Create a new transparent layer above your background layer and name it Grid.
Step 10.
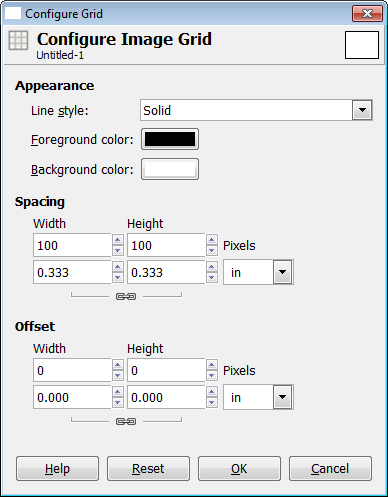
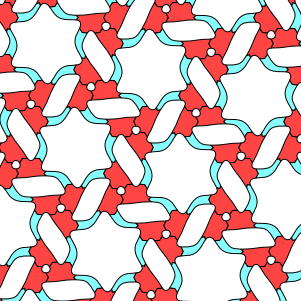
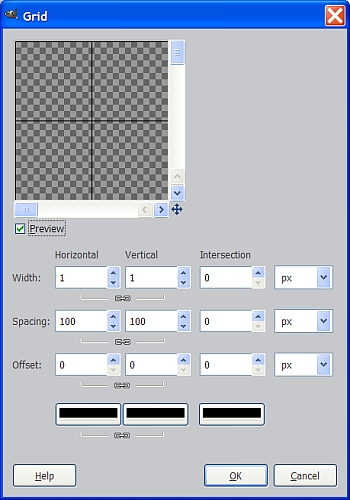
Go to Filters>Render>Pattern>Grid and enter the settings below then click OK to render a grid we will use for the placement of your swirled brushed metal pattern we created above.
Once the grid is rendered, select the background layer and create a new transparent layer above it named Pattern.
Step 11.
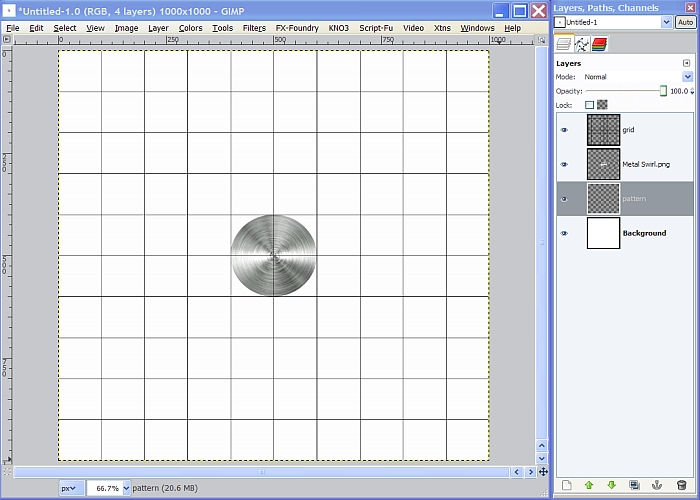
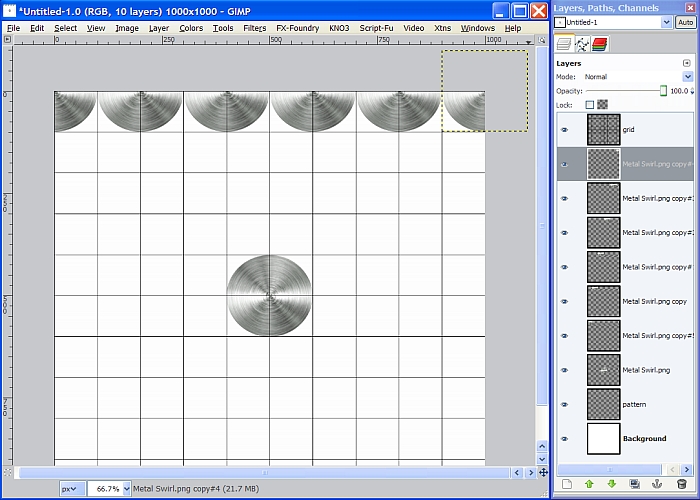
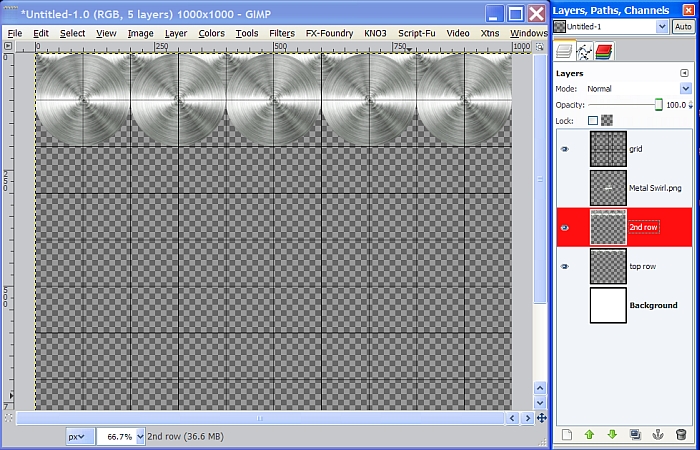
Go to File>Open as Layers and navigate to your swirled brushed metal image you saved just a few minutes ago and select it and click Open to open it. You should see it appear at the top of your layer stack in your Layers dialog. Move it down just below the Grid layer so the grid always appears on top of our images. Your layers should now look like this.
Step 12.
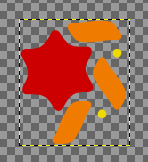
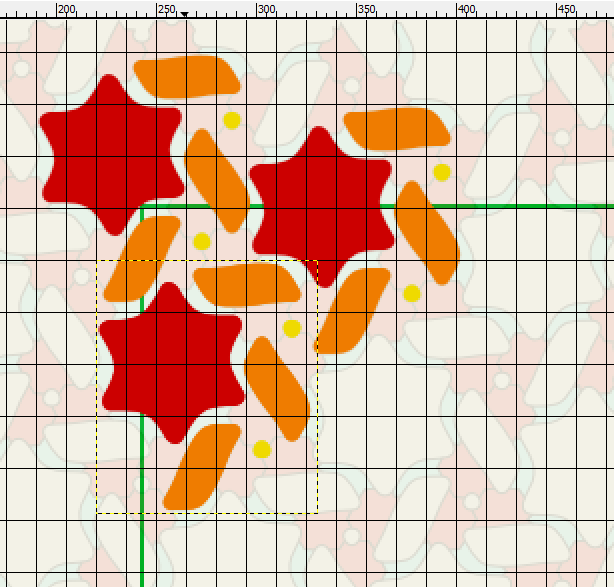
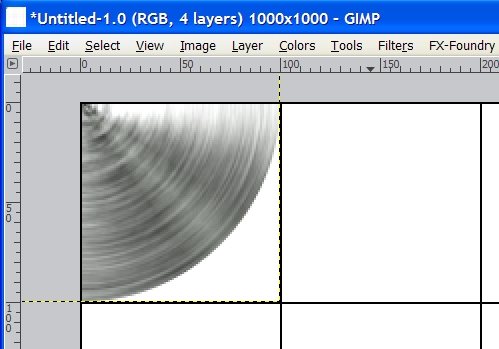
Duplicate the Metal swirl image layer, then Select the Move tool and tick the circle in front of Move the Active Layer in the tool dialog. Select the metal swirl image layer copy to make sure it is the active layer, and move it to a position in the upper left hand corner until the little crosshairs in the middle of the image layer aligns with the exact corner of the grid layer, and the edges of the image layer align with the first grid section like the screenshot below. After you get it in position, increase your view setting to 200% to verify the position is exactly correct.
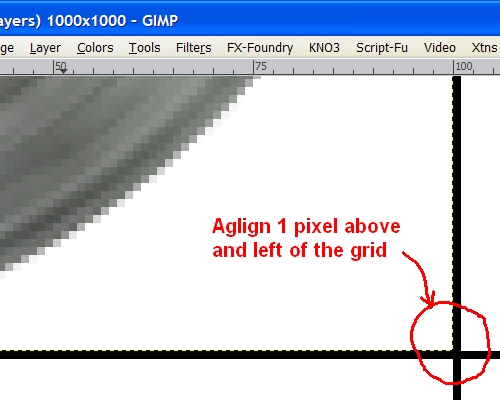
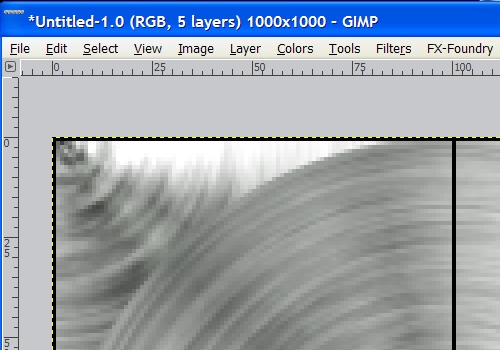
If you look closely at the second image below, the placement is actually 1 pixel above and to the left of the grid. It is very important to make sure any duplicates we make from this point forward are aligned exactly the same way so they will be arranged properly.
Corner Placement
Grid Alignment
Once you have the image layer in exactly the right place, Go to Layer>Duplicate Layer or just right click on it in the layer stack and select Duplicate Layer, whichever you choose. Use the Move tool again to move the duplicate image layer to the right until it aligns with the next grid section and the edges of the image layers are just touching and only the bottom half of the duplicated image layer is visible as shown below.
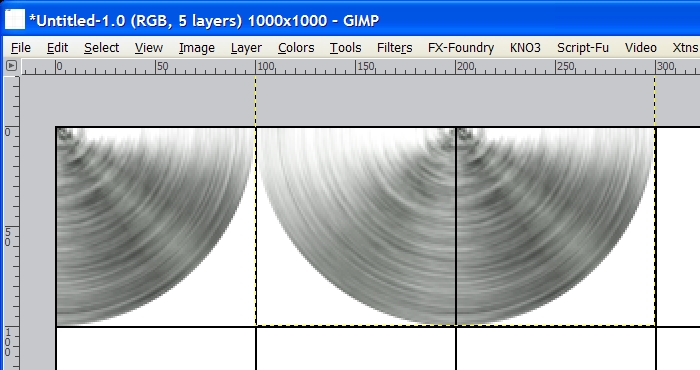
Continue to duplicate each image in turn and move into place to the right until you have filled the entire row at the top.
We have quite a few layers so let’s make this easier to manage.
Step 13.
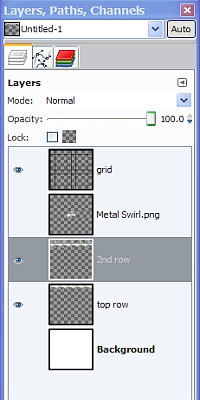
Tick the eye in front of the Grid, Pattern, Background, and the original Metal Swirl image layers to turn off the visibility of those layers. You should only see the top row of metal swirls we made. Right click anywhere in the layers dialog and select Merge Visible Layers. When the dialog pops up the default is “Expanded as necessary”, which is what we want, so click Merge and the top row of images will now become one merged layer. Since the Pattern layer was the one on the bottom in the layer stack when merged, it will still be named Pattern layer. Rename it now to Top Row and duplicate the layer. Rename the duplicated layer to “2nd Row”. Your layers should now look like this.
Step 14.
Tick the eye in front of the Grid layer to make it visible again. Select the Move tool and move the 2nd Row layer down until the lop left corner of this layer is exactly positioned and aligned with your image like so.
You may want to toggle back and forth between 400% view and 100% to be able to position layers correctly. Here’s what we have so far.
Step 15.
Duplicate the Second Row layer and name the duplicate 3rd Row. Move the 3rd Row layer down until the top is 1 pixel above the 2nd grid line and the lined up like this.
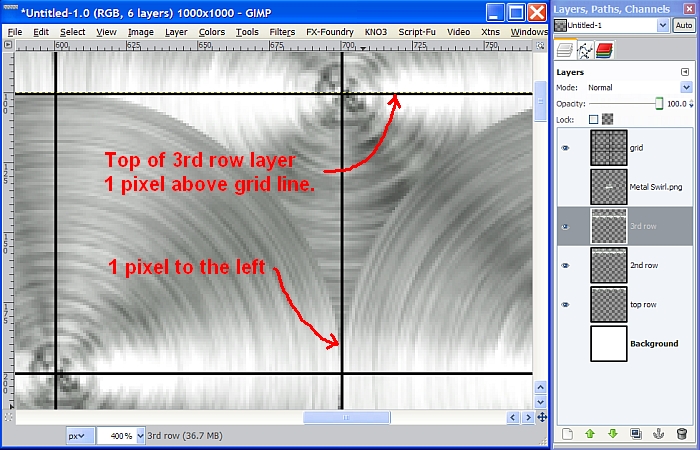
Now right click on the Third Row layer in the layers dialog, and select Merge down. Now the “Second Row” is actually the second and third rows combined. Duplicate this layer and Use the arrow buttons on your keyboard to move the duplicate layer straight down until it is positioned just like we did before only in a lower area of our grid.
Step 16.
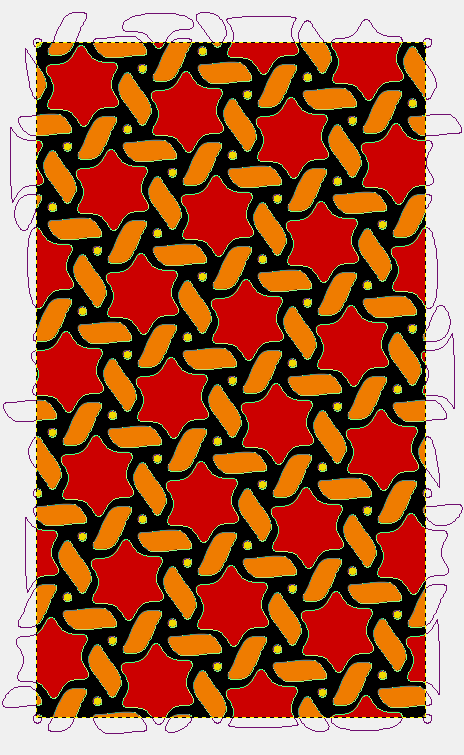
Repeat the process of duplicating the layer and moving it down to make the next two rows until the entire grid is filled. Reduce your view to about 50% and you will be able to see the entire image again. If you have all the spaces filled then delete the Grid layer and the Background layer. You don’t need the original metal swirl layer either. I just wanted you to keep it just in case you needed to fix anything. Right click in the layers dialog one more time and select Merge Visible Layers and save your image. If you want to use this as a pattern (.pat), first go to Image Scale image and enter 256 pixels in both boxes and click OK.
Our Swirled Metal is finished! I’m biased of course, but I think our image is even better looking than the photo of the real deal at the beginning of this tutorial.
Go to Colors>Curves to make it brighter or darker. In the second pic below, I used Colors>Brightness and Contrast to adjust the Brightness to about -75, and the Contrast to about 50 and then added a Full spectrum gradient layer set to Overlay.
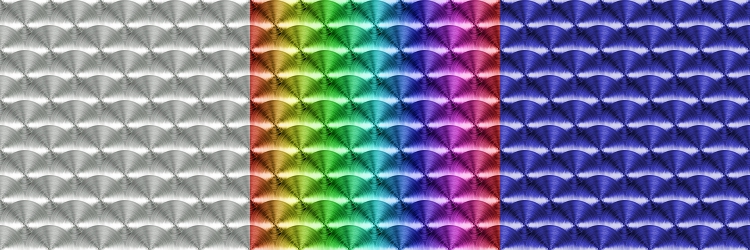
In the one on the right, I used Colors>Colorize with a Hue setting of 240.
Don’t forget that you can also use Filters>Map>Map Object or Filters>G’MIC>Rendering>3D Image Object, to make spheres, cylinders or cubes and other shapes out of your metal. There are as many options as you can think of.
We will continue this series with
Metal Wurx – Part 8 which will show you how to make a 3D hex bolt head. We’ll follow that up with
Metal Wurx - Part 9 and show you how to make 3D rivets and screws.
I hope you enjoyed this tutorial.