I recently discovered this G'MIC filter and it is excellent. The edges and details are preserved quite well, something difficult to obtain with other noise reduction methods.
I'm not yet acquainted with the Recover Details options, but after applying the Iain Noise reduction filter, GIMP Unsharp Mask works pretty well too.
Thank you very much Iain!
Edit:
Ohhh!
Looking your filters folder in G'MIC Testing now I have found the filter "Fill Holes". With the "Fill Light colours" option enabled I can reduce scratches and hot dots noise in old photos and scanned negatives. It's fantastic!
Iain, you are a master in reducing noise issues!!!
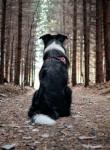
For example, try "Fill Holes" filter with the original fluffybunny image here:
viewtopic.php?f=18&t=8017Apply the filter with the next options:
Morph radius: 8
Edge radius: 50
Close radius: 0
Check "Fill light colours" option.
See the result in scratching on the floor. It's magical

Then if you want you apply GIMP unsharp mask for more detail.