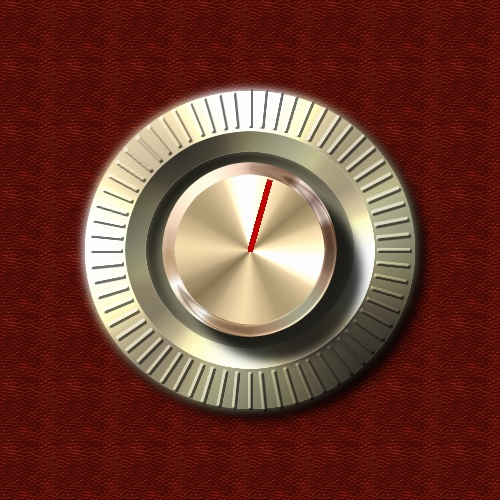
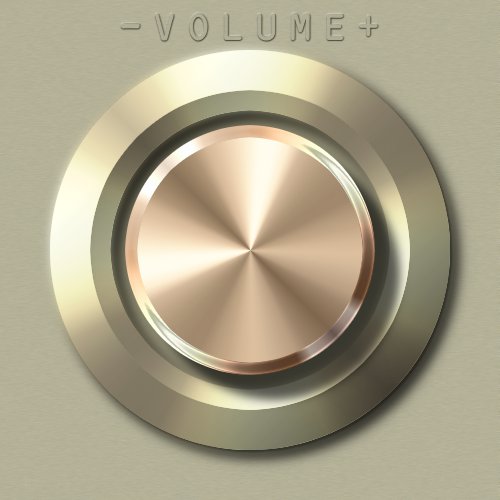
How to Make a Metallic Control Knob
In order to complete this tutorial, you will need to have Python installed which is available for download here:
http://www.python.org/ftp/python/2.6/python-2.6.msiAnd the Selection Bevel script which can be downloaded here:
http://gimpscripts.com/2011/10/selection-bevelStep 1.
Open a new image 500 x 500 pixels and use 1200 ppi for the resolution for detail.
Step 2.
Zoom in your view to about 200% for accuracy and place a vertical and horizontal guide at 250 pixels using the rulers at the top and left of your image window.

Step 3.
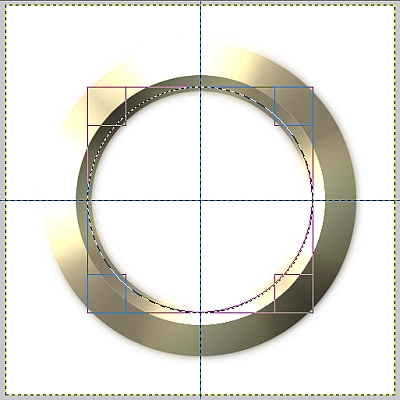
Select the Ellipse Select tool and in the tool dialog, check the two boxes for Expand from center and Fixed. Create a new transparent layer above your background layer and name it Rim. Use the Ellipse Select tool and place your mouse cursor in the exact center of your image using the guides, and drag out until your circle is 400 pixels. You can watch the boxes at the bottom of the tool dialog to get it to exactly 400 pixels.
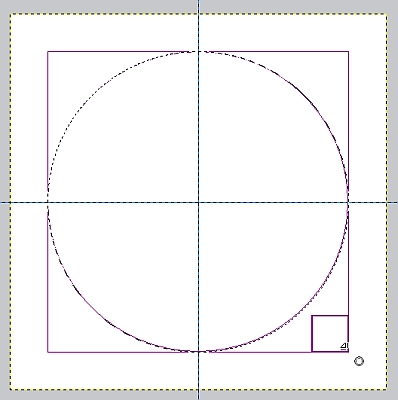
Now set your FG color to a medium gray (808080) and drag your color over to the selecton to fill it.
Step 4.
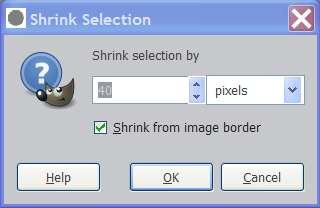
With the selection still active, go to Select>Shrink and enter 40 for the amount and click OK.
Hit the delete key on your keyboard to “cut out” the center of the gray area.
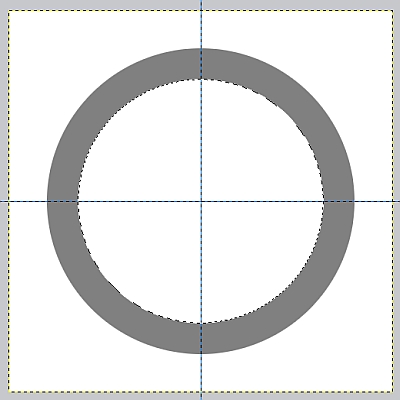
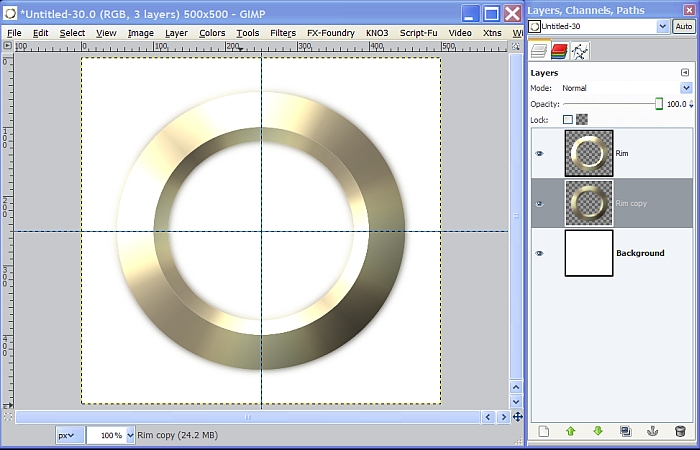
Step 5.
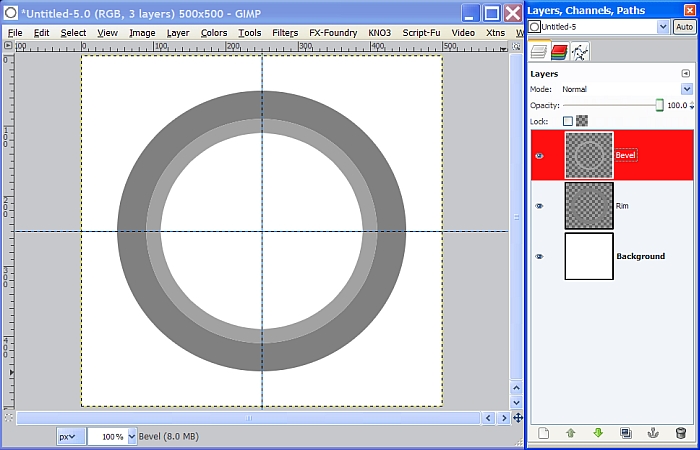
With the selection still active, create a new transparent layer named Bevel above the Rim layer. Set your FG color to a lighter gray (A2A2A2) and fill the selection. Go to Select>Shrink and this time enter 20 for the amount, hit the delete key again, then go ahead and turn off the selection. Your image and layers should now look like this.
Step 6.
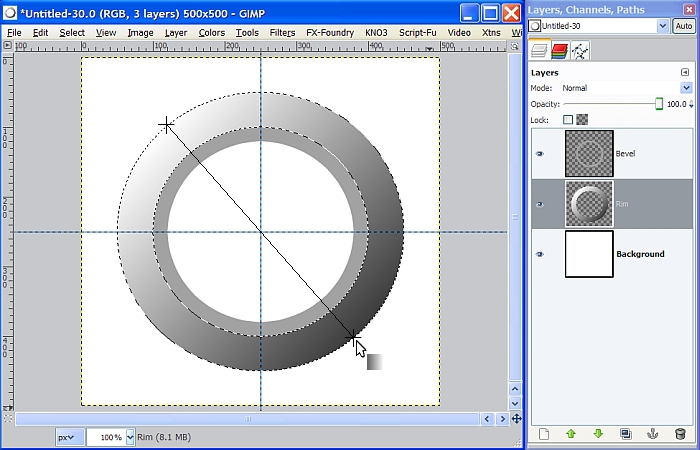
Right click on the Rim layer in the layers dialog to make it active again, and select Alpha to Selection. Set your FG color to white (FFFFFF) and your BG color to 3C3C3C. Select the Blend tool and set the gradient to FG to BG. Now drag down at a 45 degree angle through the center from the top left outside edge of the selection to the bottom right outside edge of the selection to apply the gradient.
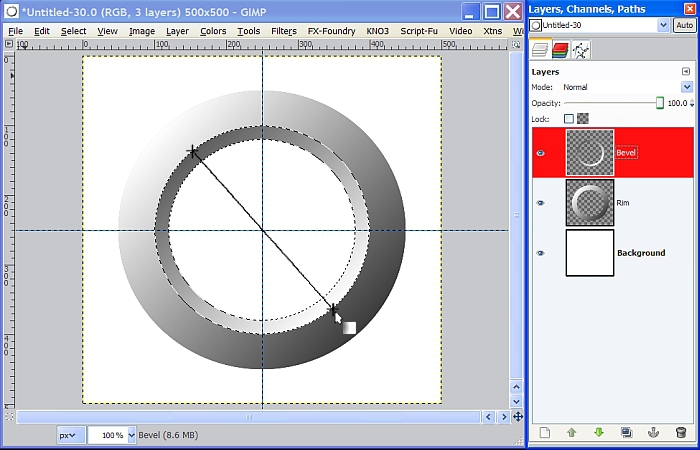
Turn off the selection and follow the same steps with the Bevel layer except check the little box next to the gradient to reverse it then apply the gradient like so.
Step 7.
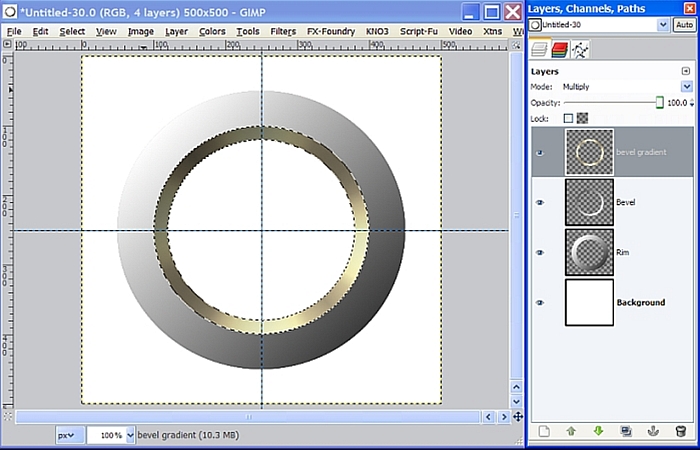
With the selection still active, create a new transparent layer above the Bevel layer, call it Bevel Gradient and set the layer Mode to Multiply. Go to the Blend tool dialog and select the Metallic 5 gradient and set the shape to Conical (sym). If you don’t have this gradient installed, you can download it from my Metal Wurx – Part XII tutorial here:
viewtopic.php?f=23&t=4097Now, use the blend tool again but this time stroke from the intersection of the guides at the center to the outside edge of the selection in any direction to apply the gradient.
Step 8.
Deselect the Bevel layer and right click on it to select Merge Down. Create a new transparent layer above the Rim layer, call it Rim Gradient, and set the layer Mode to Multiply as before. Right click on the Rim layer and select Alpha to Selection and apply the metallic gradient in the same manner as we did in Step 7, then turn off the selection.
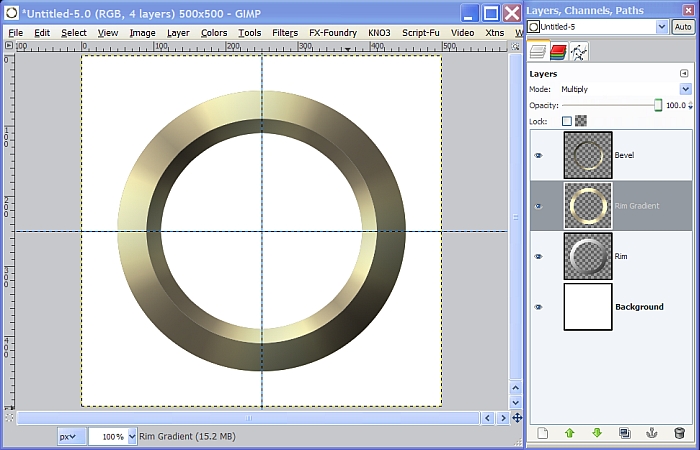
Right click on the Rim Gradient layer and select Merge Down, then right click on the Bevel layer and Merge it down with the Rim layer in the same manner.
Step 9.
Now that we are back to one working layer, duplicate the Rim layer and go to Filters>Blur>Gaussian Blur and enter 15 for both settings.
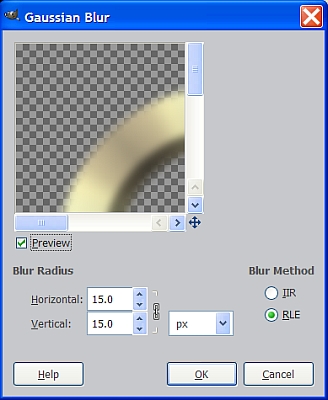
Now move the duplicate layer down in the layer stack below the original to give us a soft background halo for the Rim.
Right click on the original Rim layer and select Merge Down so that we are back to a single working layer. (you will need to rename your layer back to Rim)
Step 10.
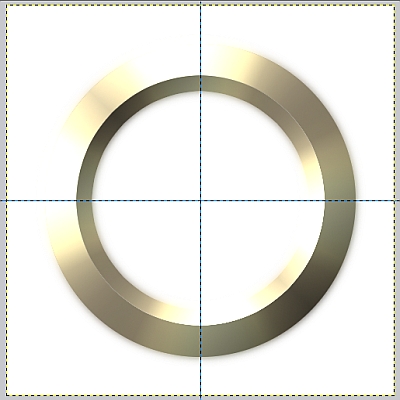
OK, now we have our outside part of our knob completed, but it’s too dark and dull looking. Go to Colors>Levels and for the output value on the right enter 175 then click OK.
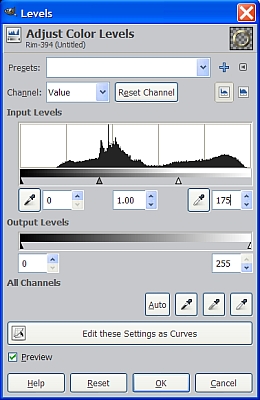
Now our Rim looks a bit shinier and more like metal.
Step 11.
Create a new transparent layer and call it Base. Go get the Ellipse Select tool again (the settings should still be the same with the two boxes checked) and starting at the center, make another selection slightly larger than the inside area of the Rim at 290 x 290 pixels.
Set your FG color to 6A6751 and your BG color to A29F85. Grab the Blend tool again and make sure the gradient is still set to FG to BG, but set the Shape to Linear and click on the little arrows next to the gradient to uncheck the box. Next, we stroke diagonally through the center of the selection, just like in Step 6 above, to apply a very slight gradient.
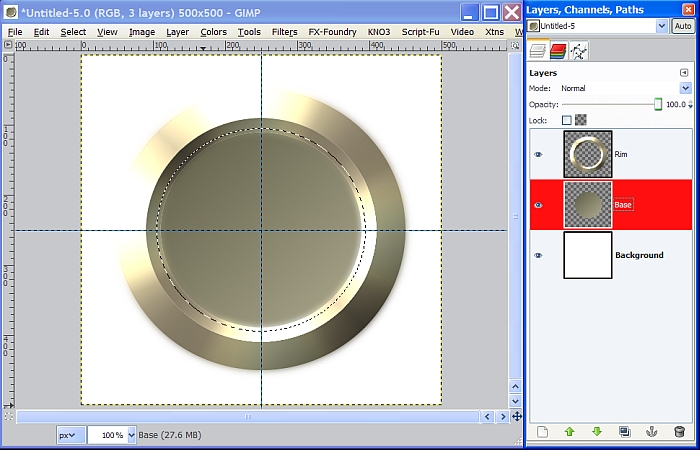
Once your gradient has been applied, this will provide a background for the knob portion.
Step 12.
Create a new transparent layer above the Rim layer called Knob. Your selection should still be active so go to Select>Shrink and enter 20 for the amount. (it should still be set to 20 from the last time) Select the Blend tool and set the Gradient to the Metallic 2 gradient and set the shape to Conical (sym). Check the little arrows next to the gradient to reverse it and stroke from the center to the edge of the selection to apply the gradient.
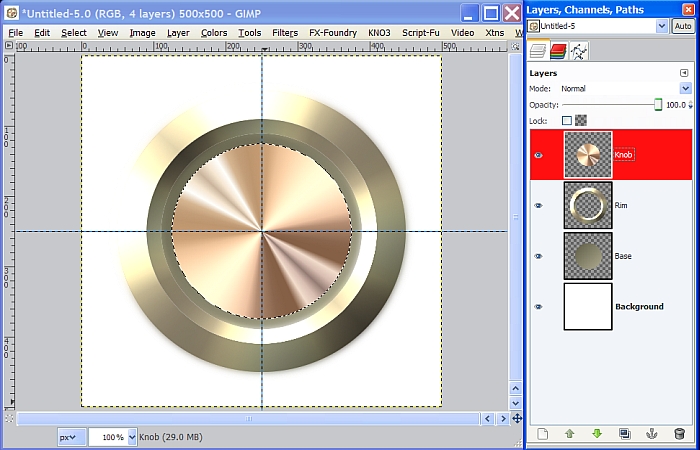
Step 13.
Next, we need to create a new transparent layer and we’ll call it Knob Center. Go to Select>Shrink again and this time enter 12 for the amount then click OK. Use the Blend tool again but set the gradient to the Metallic 10 gradient and with the shape to Conical (sym) click on the little arrows to reverse it. Now stroke from the center to the edge of the selection to apply the gradient.
Now, go to Colors>Levels and for the Output value on the right enter 200 then click OK.
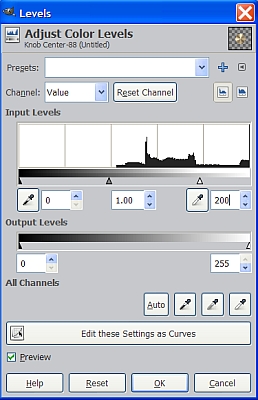
This will brighten up the gradient quite a bit. Turn off the selection for this layer and go ahead and turn off the guides as well.
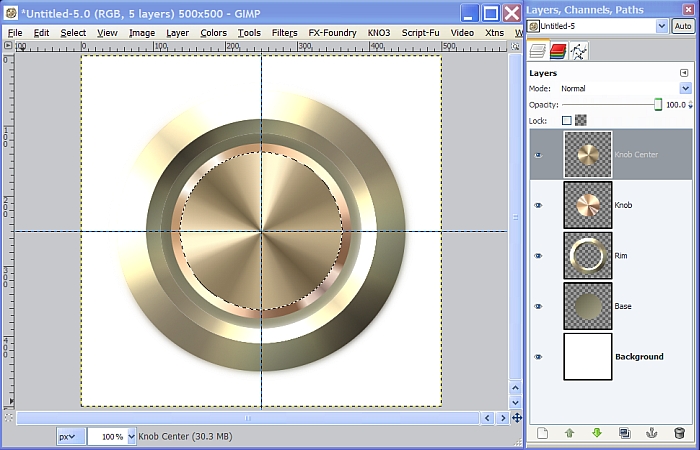
Step 14.
Right click on the Knob layer in the layers dialog and click on Alpha to Selection. Go to Filters>Distorts>Bevel and enter the following settings. (this is the Python based Selection Bevel or Bevel 2 script you can download from
http://gimpscripts.com/2011/10/selection-bevel/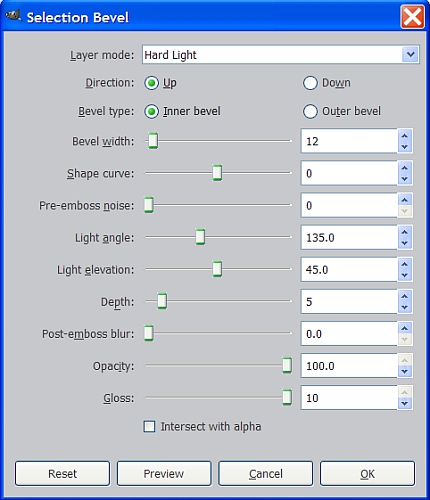
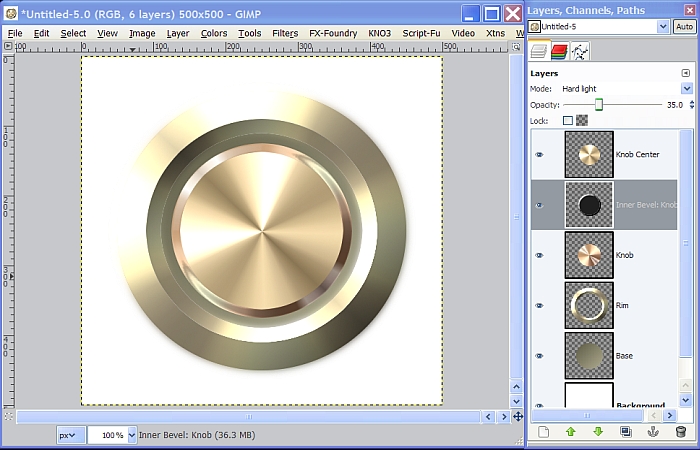
Once the filter is finished, it will create a new “Inner Bevel” layer that you will see in the layer stack. Turn off the selection and set the layer Opacity to about 35%.
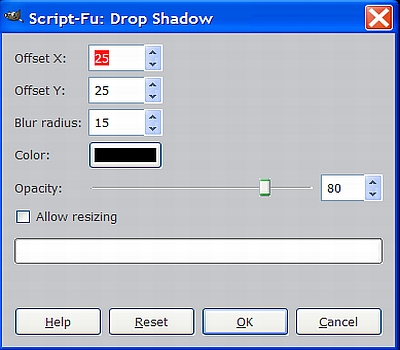
Step 15.
Merge Down the Inner Bevel layer with the Knob layer, then Merge Down the Knob Center with the Knob layer. Next, Go to Filters>Light and Shadow>Drop Shadow and enter these settings then click OK.
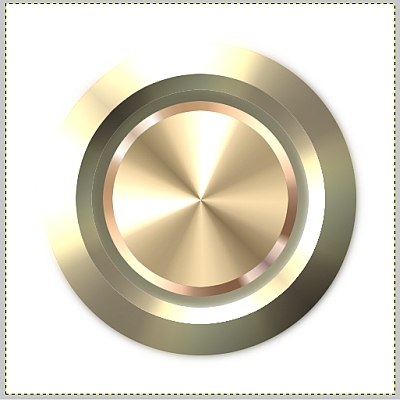
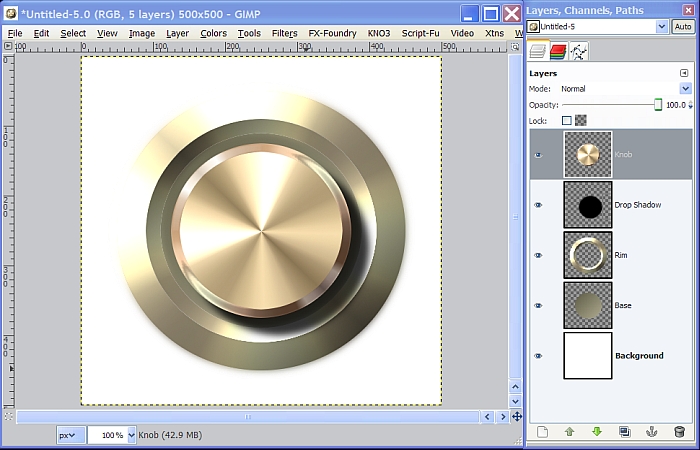
Here’s what we have now with the drop shadow.
Step 16.
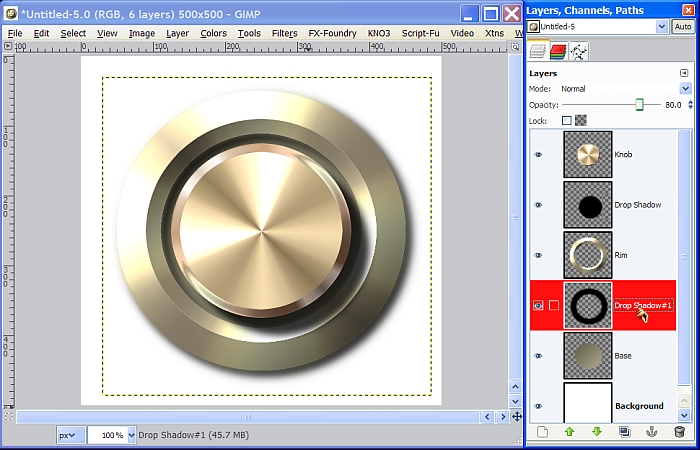
Select the rim layer and go to Filters>Light and Shadow>Drop Shadow again but this time use 8 for both X and Y values.
Step 17.
Turn off the visibility for the Background layer and right click anywhere in the layers dialog to select Merge Visible Layers.
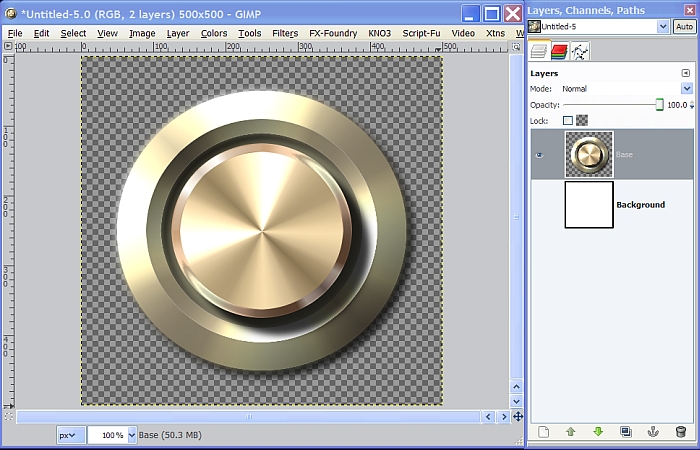
Save your image as a PNG file so it can be inserted as a new layer when used for additional work.
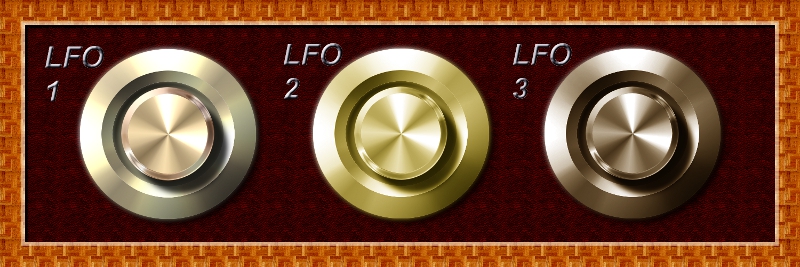
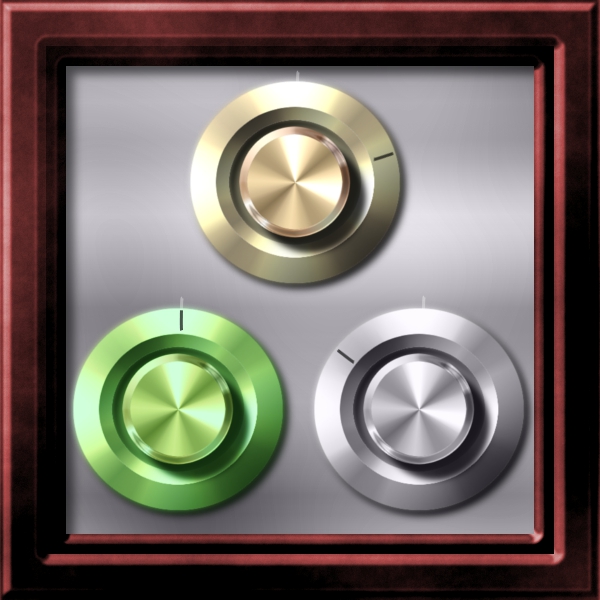
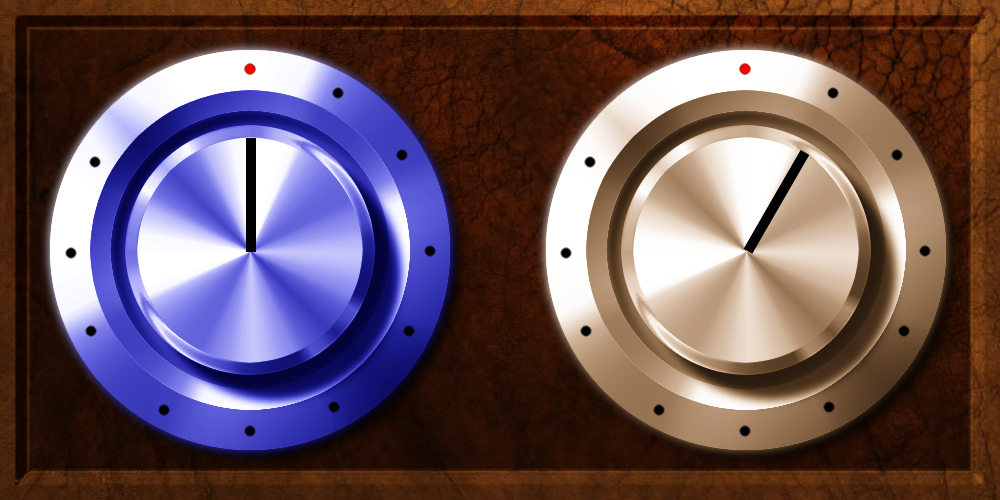
At this point you can change the color of the knob assembly with only a few steps and I’m just going to run thru them quickly. First, desaturate the knob layer, (Colors>Desaturate) then add a new transparent layer above it, filling it with the desired color and setting the layer Mode to Overlay or whatever you think looks best for your purposes. Here’s a couple of examples of Copper and Blue, both using Overlay for the layer Mode and a couple of other features added for a functional look.
I hope you enjoyed this tutorial. Coming soon in the Metal Wurx series, I’ll show you how to make some 3D raised buttons for a control panel so watch for it.